
Purpose of Animator
Animator is an audio plugin with a geometric engine to calculate the movement of objects in a scene. The geometric data is then used to control a customizable effect chain and a panner. The objects can be controlled from three automated parameters or from a path where the objects travel along.
Contents
Installation and Activation
If you haven’t already installed it, you find the installer on the animator page. It is the same installer for the demo and the actual plugin. You can safely run the installer of an updated version, it will simply replace the existing version. The DAW needs to be restarted in order for the new version to be picked up.
When the plugin is opened for the first time, it will greet you with the about panel containing the steps for the activation. The panel can only be closed when a license is found or the demo was started.
To start the demo, the user clicks the demo button so the close button appears to dismiss the about panel.
The plugin needs an online connection to start the demo. If you need to test the plugin or an updated version again, get in touch via support@foleysfinest.com. To identify your machine, access the request file from the offline activation.
When you bought a license you will get a serial number via email. To activate a machine, select the “Activation” tab in the about page and enter the serial number. The plugin will access the server and activate the machine. If you already have 3 machines activated, you will have to select a machine to deactivate in lieu. Or you buy another license and enter the new serial number. That way you can use mre than the three machines in parallel.
If your machine is airlocked, you select the “Online activation” tab and follow the instructions.
Geometry

At the heart of Animator there is a 3-D scene editor. The scene editor shows the room with the speakers and the object. Depending on the automation mode, the user controls the position directly or draws a path.
At the top the user can select of out of three predefined view angles: Top, Side and Rear. In addition, when dragging with the ALT key, the user can rotate the scene.
The mouse drags will keep the object on the X-Y plane. To move along the Z-Axis, the user has to hold the SHIFT key while dragging.
In the Top, Side and Rear view the mouse will control the object on the viewed plane.
In Path mode clicking a point allows modifying the point and the path will be updated automatically. Double-clicking the point will toggle from corner to smooth and back. Right-click opens a context menu. There you can delete the point or clear the whole path. The path can be set to closed or open using the context many on any point.
Stage and World Settings
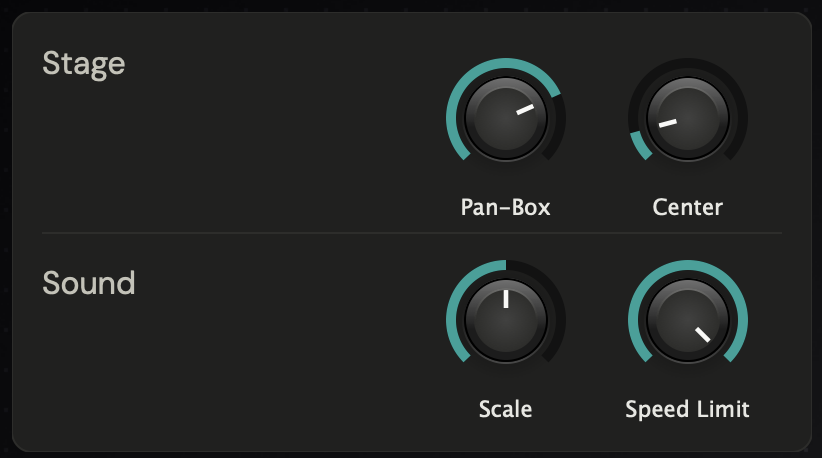
There are some basic settings in regards to the geometry that the user can change:
- Scale
The stage has a scaling factor. This is taken into account when selecting e.g. “Real Distance” as modulation source, see Modulation. - Center
This setting controls, how much of the phantom center is routed to the center speaker.
Some mixers prefer to reserve the center speaker for e.g. dialogue. In that case you can dim the center amount, and the signal will be routed to the left and right main speakers.
When the center is set to 100%, a sound placed at the center will play completely in the center speaker and not on the left and right main speakers. - Pan-Box
When moving a sound inside the scene, the sound will be panned as a mix of several speakers. If the sound is supposed to appear outside the space of the speakers, the pan-box can be reduced. In that case the signal will be panned full to the speakers while still be placed inside the room. - Speed limit
In order to achieve a smooth movement of the object, the speed limit can be reduced. This will slow down the movement of the object.
This is also useful to not exceed the physical limitations.
Panner mode
When set to panner mode, the user controls the object directly with mouse clicks. The object will automatically follow the movements of the mouse. It is advisable to set the speed limit, so the object travels smoothly and doesn’t exceed the physical limitations, like jumping.
To learn more about the built in panner and the pan box, see Panning.
Path mode
In path mode, every click will add a point to the path. The path will smoothly pass through each of the points. To toggle the point from smooth to a hard corner, double-click the point.
With right-click on a point, the context menu allows removing a point or clearing the whole path. Also in the context menu, the path can be closed, which simply connects the end of the path to the start.
Walking the path
The position along the path is controlled by the automated “walk” parameter. To walk along the path, the user records a ramp.
Auto Walk (OSC)
Instead of automating the walk parameter, the position can be controlled by an LFO, which can be set to “Circle” where the end jumps to the start, “Zig-Zag” where the object bounces back and forth, or “Sine”, where the object will be slowed down towards the ends and return smoothly. Setting to “Stop” the Walk will be controlled by the automation again. The speed of the LFO can be controlled with the “Speed” parameter. The “Follow host” toggle allows the LFO to be started and stopped with the hosts transport.
Modulation
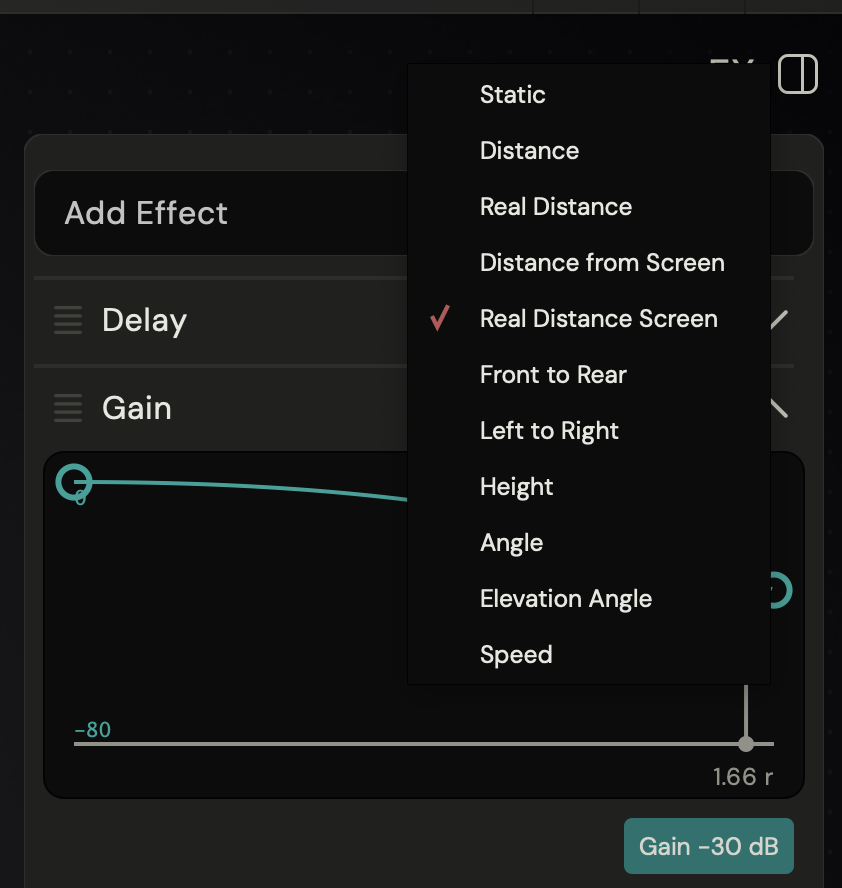
The positional information of the object and the movement are used to control the effect chain. Each effect has one or more parameters that can be mapped to one of the following aspects:
- Distance: the distance from the center in multiples of the radius
- Real Distance: the distance from the center multiplied with the scale factor, with the range of 1 m to 1 km.
- Distance from Screen: the distance from the center speaker at the virtual screen of the theater, again in multiples of the radius.
- Real Distance from Screen: same as Distance from screen with the scale factor applied.
- Front to Rear: the Y-Axis of the room, ignoring left/right and height.
- Left to Right: the X-Axis of the room, ignoring front/rear and height.
- Height: the Z-Axis of the room, ignoring left/right and front/rear.
- Angle: the angle to the position towards the 12’o clock position.
- Elevation Angle: the angle to the object’s elevation.
- Speed: the speed of the object.
To add an effect, click on the “Add Effect” button. From the opening drawer click on an effect icon and it will be appended to the effect chain. Clicking anywhere else closes the drawer.
Currently the following effects are available:
- Delay
- Gain
- High Pass Filter
- Low Pass Filter
- High Shelf Filter
- Low Shelf Filter
- Band Pass Filter
- LFE Gain
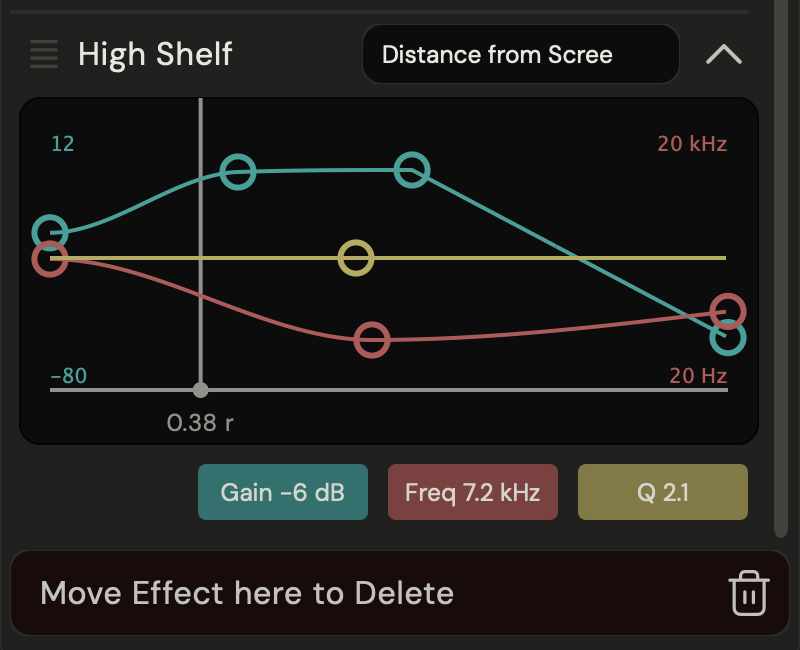
By clicking to the fold-out toggle on the right, the mapping from geometry to parameter can be visualized and adjusted.
Clicking on a plot adds a control point you can drag to adjust the mapping. Double clicking the control point toggles a hard corner or a smooth transition. Right click deletes the control point.
The order of the effects can be changed by dragging the effects with the left button with the three horizontal lines. To remove an effect, drag it down into the trash bar.
CMD+Click on an effects toggles the effect on and off.
Presets
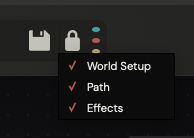
Animator presets contain three different parts: the world and sound source settings, the path and the effect chain. Often you only want to load or step through presets to find the perfect settings for that aspect. For that purpose, Animator lets you lock those aspects separately opting out from loading or saving from the preset.
The lock icon shows as colored dots, which aspect is active when loading or saving a preset. By clicking on the lock icon, you see the names to the correspondent aspects.
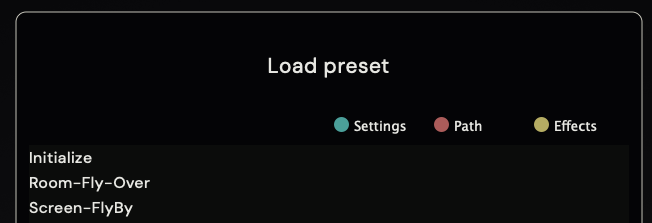
When you load a preset by clicking into the Preset Name field, the aspects are preselected, but can be changed for this single load action. The same applies when you save a preset by clicking on the save icon.
Panning
After the effect chain, the object is panned with a panner. Depending on the selected channel format of the track, the signal will be panned in stereo or 3-D. When mono is selected as output format, the panner is ignored. This is useful if you want to send the signal into an atmos object, see Object Routing.
Because the objects position can be outside the room with the fixed speakers placements, there is a pan box to limit the panning. The pan box can be used to keep the object in a smaller space or to be projected outside the pan box for a more extreme panning.
Pan Box Limit
The panned position will follow the actual position. But when the position leaves the pan box, the panned position will be cropped to the pan box bounds while keeping the direction towards the listener.
Pan Box Scale
The panned position will be scaled to the normalized box, while keeping the direction towards the listener. This means when the position crosses the pan box, the panned position will already reach the outer bounds. This way a fly by inside the room can be realized and still achieve a hard panning e.g. along the front.
Object Routing
To use the 3-D information as Atmos object, a bit of trickery is necessary. At the time of writing there is no way to send the geometric information to the Dolby Panner. Instead the user has to record the X_out, Y_out and Z_out parameters and copy them into the pan automation of the Pro-Tools panner. We haven’t tested, but presumably a similar workflow is possible in other DAWs as well.